Showing posts with label butter London. Show all posts
Friday, May 31, 2013

Owl love you forever - cute owl nail art!

This is a bit of a belated post because the day after I finished these nails and posted them on instagram, I copped a mega chest infection and have been knocked out ALL week! These were inspired by looking at wedding cake toppers last weekend as the fiance and I are trying to plan our wedding, yay!


I was looking at Etsy and found these super cute wedding cake toppers and thought these would make cute nails. I'm so tempted! They would make great keepsakes too.


The base nail colour is butter London's Fruit Machine from their spring 2013 collection and it took maybe 2-3 coats to get a nice opaque colour. The darker pink is also butter London Primrose Hill Picnic, a gorgeous hot pink. I wish I did white on the outside so the owls would be a bit more contrasted but they're still super cute. The tree branch is Essie Very Structured which is a chocolate brown (I've been looking for such a colour!) and the orange is Essie Fear or Desire. Can't say that I needed another orange but adorebeauty had a buy 2 get 1 free GWP promo and I'm a sucker for promos :-(


I wanted to do owls and a matte top coat on all nails but dinner took priority ;-) Maybe next time! Anyway I'm still sniffly and cold so I'm going to go back to bed and relax. It's a cold rainy day and those are meant to be spent warm in bed. Until next time...

Tuesday, April 16, 2013

Simple star nail art with butter London HRH, Shambolic

Hi everyone, this is a short post to show you the gorgeousness of two purple butter London's - HRH with Shambolic. I also painted a few stars because I just can't stop after painting my nails ;-)


HRH is a metallic purple with micro blue flecks. Shambolic is a glitter polish very similar to HRH with blue and purple glitter with also bigger pink glitter chunks. Gorgeous!


These colours were made to be paired together @_@ Or I just like purple, it's a bit of both I think...


I received Shambolic for Christmas from the lovely bf, it was a part of a holiday set with other glitter polishes (yet to be worn, for shame!) HRH I think I purchased from a beauty salon that unfortunately closed down. I only did about one coat of Shambolic over 2-3 coats of HRH (some fingers were 3 coats where the polish applied a bit thinly). The glitter polish does appear to run clear so it should be paired with a base polish.


And just because I wanted to paint *something* I figured stars would be appropriate, with a shooting star on the thumb. I had no design intentions, just painted and dotted wherever :-) I used OPI Alpine Snow as usual. Little bit messy but hey I was watching Kourtney and Kim take Miami! Anyway, I hope you enjoyed and I'll see you next time!


Thursday, April 4, 2013

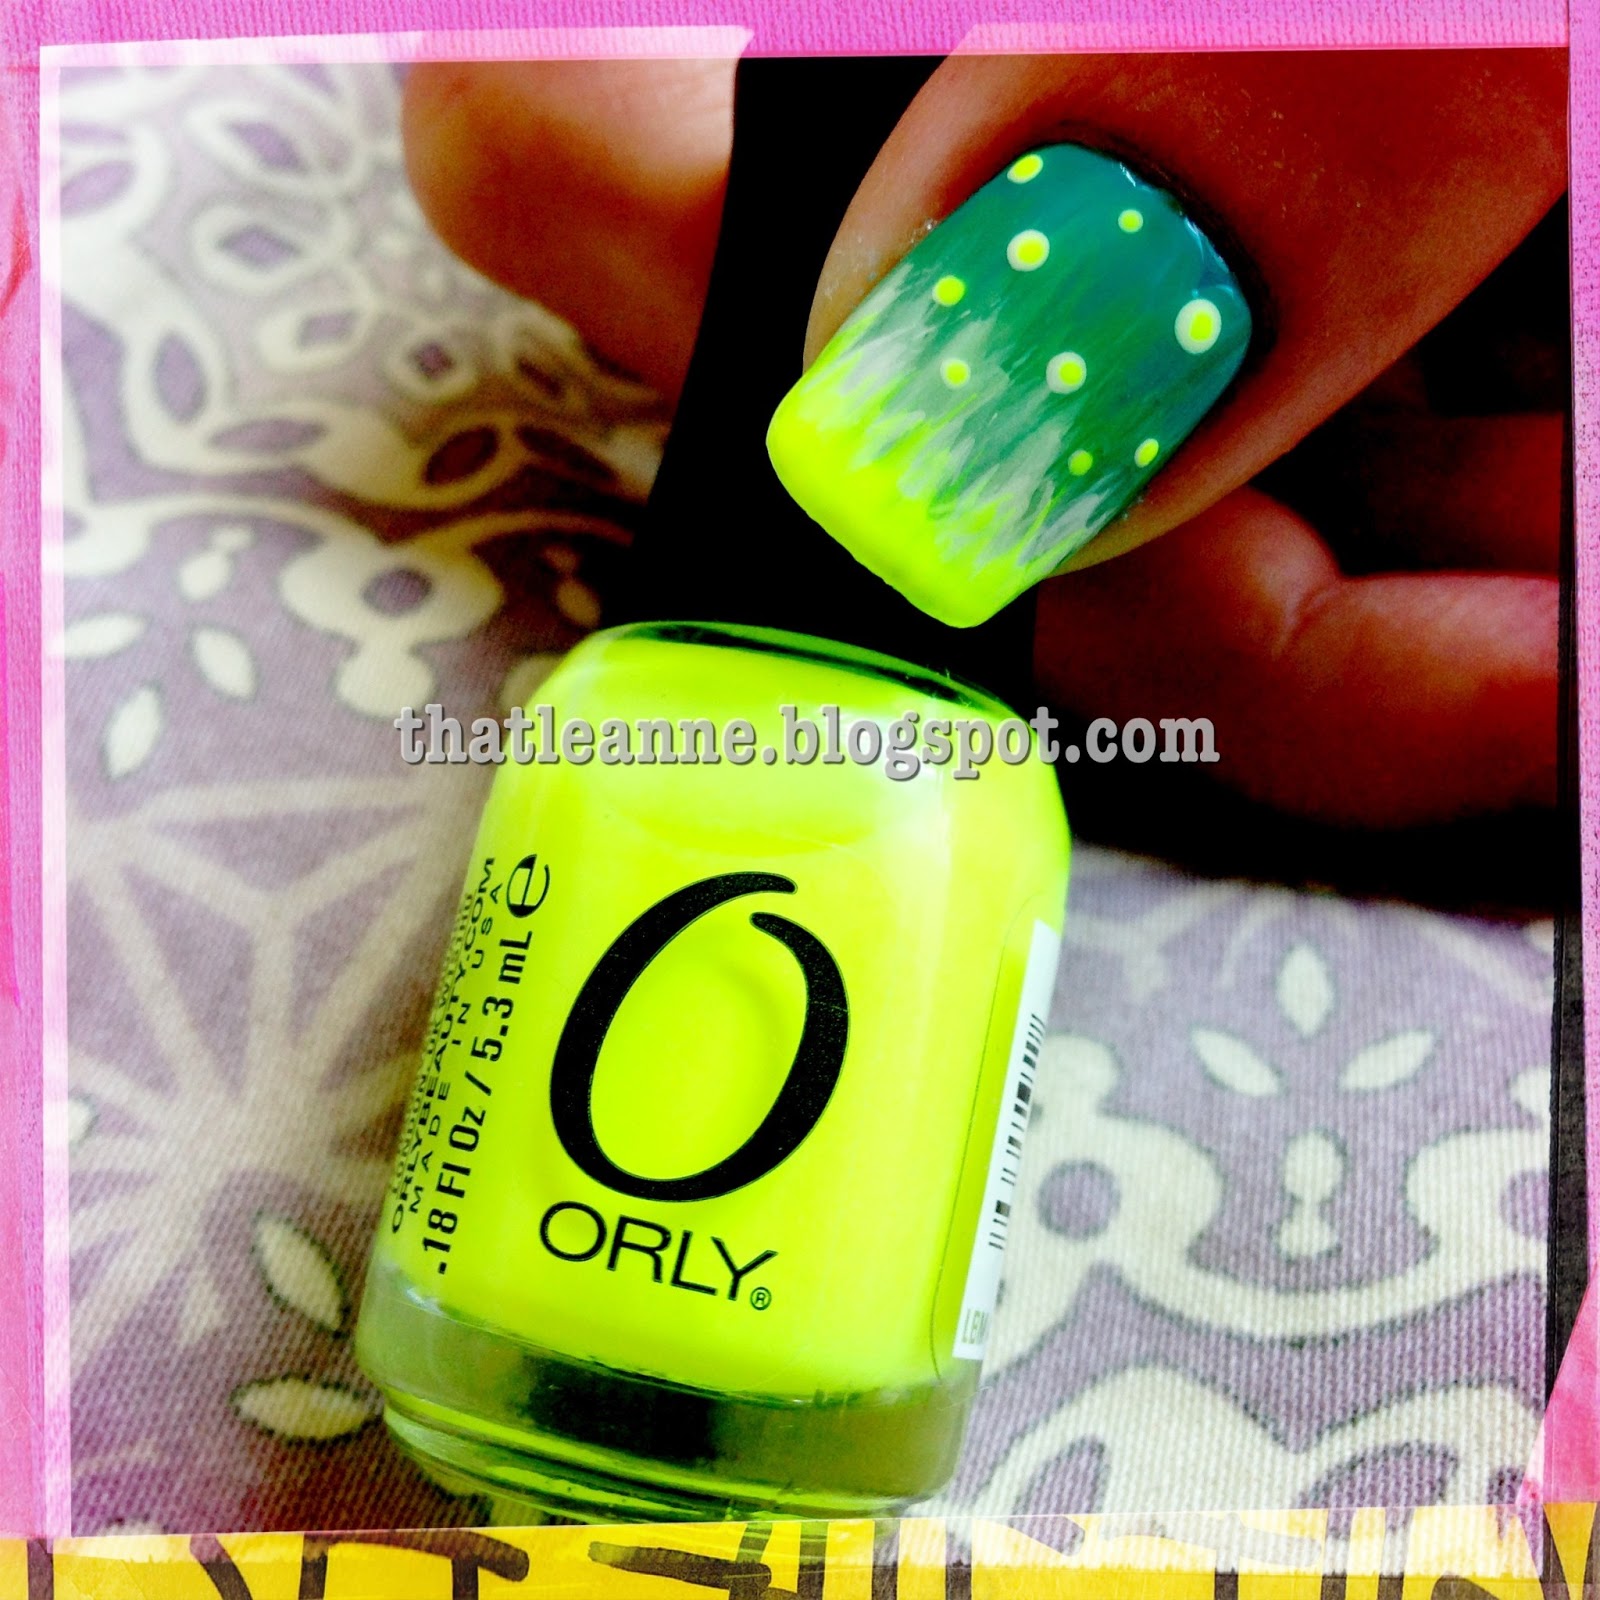
Fireflies inspired nail Tutorial feat. Orly Glowstick

Recently I purchased 3 very neon Orly polishes from the 2012 Feel The Vibe collection. I did not know about this collection, I was picking up some medicine from the pharmacy and low and behold there was a new mini Orly polish stand at the check out. Convenient location. I spent more on Orly polishes than I did on medicine of course ;-) I picked up 3 from the collection, one being a bright fluoro yellow called Glowstick. And still in the butter London mood, I paired it with Slapper from the 2012 spring collection (we will not discuss how I managed to purchase Slapper twice accidentally):


In my mind I was picturing a beautiful field of glowing fireflies but on nails I can't decide if it looks like the fireflies I had in mind.... or a bubbling pit of doom :-D And if you think this looks familiar, you'd be right, it is a neon recreation of my loved Purple Starry Nights Tutorial. That fan brush had to get some use again :-)


So to recreate this firefly/bubbling pit look we need a neon yellow, and a variety of mint polishes. And for someone who really doesn't fancy mint colours, I seem to own quite a few:


Left to right we have butter London Fiver, OPI Mermaid's Tears, Essie Absolutely Shore, MAC Ocean Dip, Orly Glowstick, butter London Slapper and Orly Alpine Snow. You probably don't need this many, I just grabbed all I could locate. Mermaid's Tears and Ocean Dip are probably interchangeable. Probably don't even need Absolutely Shore but use as many as you like! The effect is discreet in the end.

Let's begin the tutorial! All steps were shot in the iPhone app Hipstamatic, check it out, it's a fab app for lazy "photographers" like myself.


Step 1: Paint your base coat. I chose butter London Slapper from the 2012 Spring Collection. Honestly photos do not do this polish justice. I took photos with a variety of lights with both my phone and SLR and none could show its true beauty. All I can say is to buy it if you like Teal colours. It also applied beautifully. It's dark and not really a Tiffany comparison but it's pretty. Enough said.


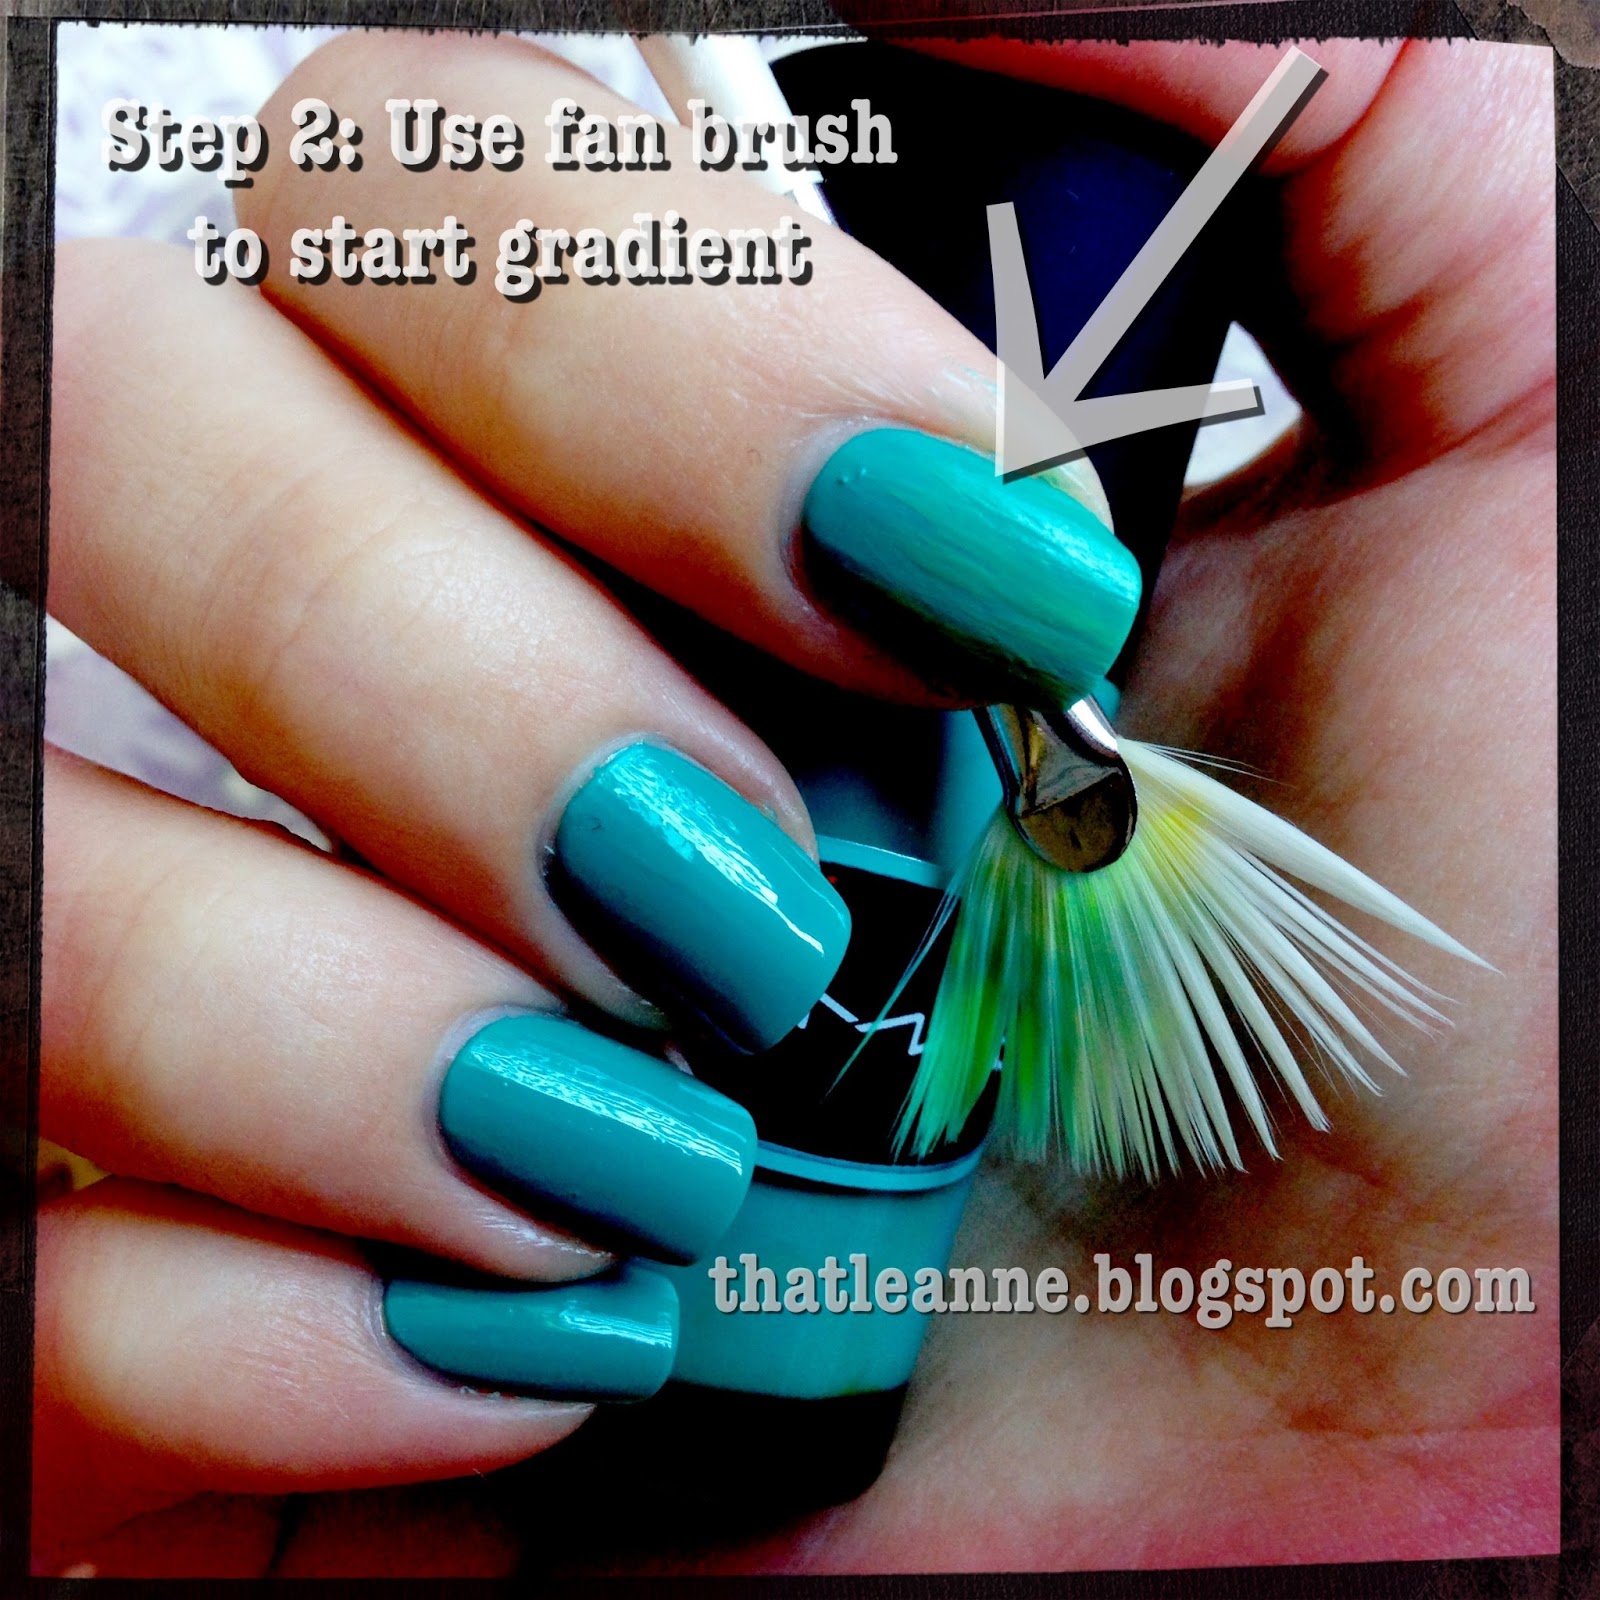
Step 2: Take a fan brush and paint a little on the edges and create downward strokes on the nail. The MAC colour is really subtle against Slapper hence the large arrow above. It's also only on one nail.


Step 3: Continue the fan gradient with another lighter colour. Clean and re-fan your brush regularly otherwise it'll stick together.


Step 4: Repeat step 3 with a lighter colour! Here we have Fiver from the Spring 2013 collection.


Step 4 continued - keep going with as many colours as you like! I clearly have too much time on my hands.


Step 5: Finish with a white fan brush coat. This is important as it enables the neon shade to look opaque and bright.


Step 6: Using a dotting tool (I use the Orly brand) to create different sized dots across the nails. They too will be a base for the neon yellow. Use both sides of the dotter and apply more/less polish for different sizes.


Step 7: Go over the dots again with the neon colour.


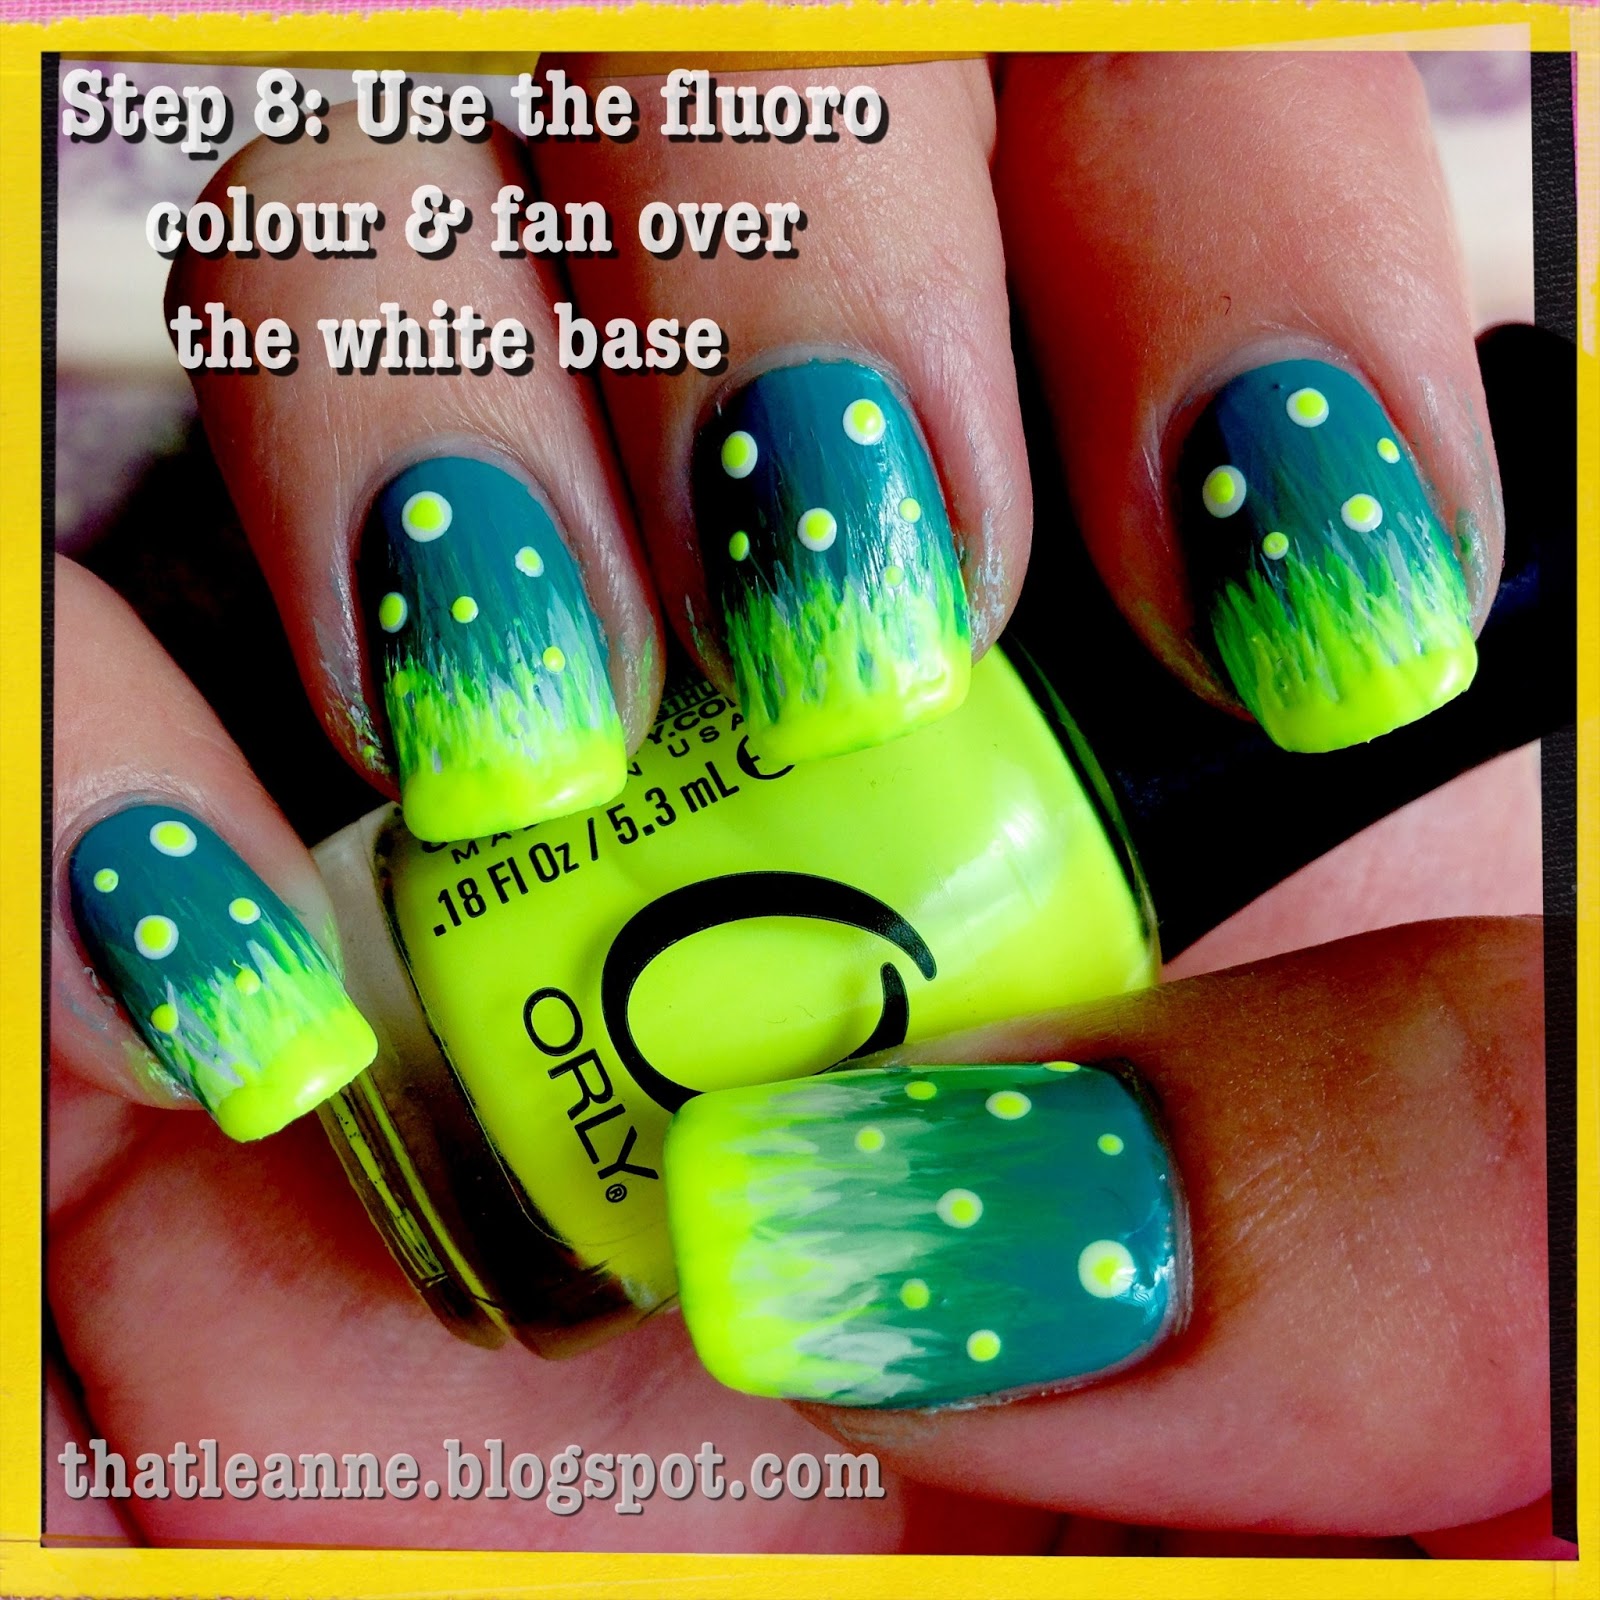
Step 8: Final fan brush over the white base and fill more at the tips so it's nice and opaque. Use the nail polish brush for the tips if necessary.


Step 9: Clean up around the nails with nail polish remover and add a top coat! I use Sally Hansen Double Duty Base & Top Coat.


And that's what it looks like in sunlight, bright as can be! We went out for a late lunch on the lake and it was such nice weather. Although you can feel winter coming...

Well that is it for the fireflies slash bubbly pit tutorial! I  hope you enjoyed the look and I'll see you next time...

Saturday, March 30, 2013

Chicken and egg nail art for Easter!

Happy Easter! I felt like getting one more Easter mani in before I have to pack away my colourful pastels. I wanted to do another look with the new butter London spring polishes and this is what I came up with:


Fiver is a gorgeous mint green and although it's looking a little bluer above, I can assure you it's minty goodness.


I really felt like I needed 3 coats of Fiver because it was a little streaky. Oh how I wish it was spring here, but alas we are heading into autumn and winter.


Obligatory over filtered and prettied up instagram shot above. Today was one of those 'start painting and see where it takes you' days. I didn't think chickens would quite fit on all nails so I decided to finish with eggies. The brown used was actually another button London polish fave of mine - Yummy Mummy.

Well that wraps up Easter nail art, I hope you enjoyed them! Now time for CHOCOLATE! Until next time...


Wednesday, March 27, 2013

Easy Easter Egg Nail Art How To!

Hi everyone, it's time for the 2013 Easter Egg mani. For this look I wanted beautiful pastels and what better collection to use than the butter London 2013 Spring collection (despite the fact it's autumn/fall here :-) 4 of the colours made for a simple yet beautiful Easter egg nail art:


Butter London have 6 spring shades out and while I originally bought the purple, pink and yellow, I just had to have the mint green and some others... but here we have the four used in the look above, all prettied up with my new Easter decor from Bed Bath and Table:


No filters have been applied in the first nail art image at the top of this post so use that as your guide. I would swatch but I have eggs on my nails ;-) The pink is called Fruit Machine. Hmm is that related to the Neopets Fruit Machine I wonder (which I WON this week after 10 years of playing, hmph I mean yay?) The yellow is called Jasper, the purple Molly-Coddled and the mint green is called Fiver. Beautiful opaque cremes but I would say that the yellow needs a white base if being painted over another colour.


Step 1: Paint your base colour. I chose Molly-Coddled, the purple because I love purple, no other reason! It applied beautifully opaque in two coats. Cleaned up really nicely too. Can't say that about all polishes.


Step 2: Draw a white base in a half egg shape. Ideally use a small nail art brush (or even a mini polish brush) to draw the outline and fill with your regular paint brush.


Step 3: Repeat step 2 but leaving a small white border to make the yellow pop a bit more. Also, the yellow wasn't as opaque as the other colours and needed a white base to really bring out the yellow. But you could choose any colour as your egg colour.


Step 4: Take a small nail art brush and draw short zigzags or continuous Ms from one side of the egg to the other. Somewhere in the middle ideally, mine were a bit too high up I think. I chose The pink for the top zigzag. Fruit Machine is beautiful, I really need to wear it on its own.


Step 5: Repeat step 4 just under the first zigzag with another colour. I choose the mint green Fiver.


Step 6: Use the large end of the dotting tool to dot below and above the zigzags. The last step is to switch to the smaller end of the dotting tool and fill with your desired colours. I went pink on top and mint green on bottom, ties it all together nicely. And that is it!


And lastly we have my Easter haul. Please someone hide my credit card, Bed Bath and Table had 50% off their Easter range and I got a few things :-) They are actually for my wedding next year! The eggs were the only real Eastery thing I bought, the rest were just pretty and pink. Of course there are some new OPIs (I needed a new Alpine Snow and I bought a full size of Don't Burst My Bubble as I plan to use it for my wedding day). Aaaand I bought two new season Pandora charms, sigh.

Well I hope you enjoyed the post and hope you have a wonderful Easter long weekend! Until next time...

Saturday, March 10, 2012

Watermelon Nail Art Take Two!
Hi everyone! So I went to Lush a few weeks back and I noticed the lovely lady serving me had watermelon nail art. I'd done *actual* watermelon slices before but I thought I'd try and recreate these ones that I saw with my lovely new butter London polish Primrose Hill Picnic:


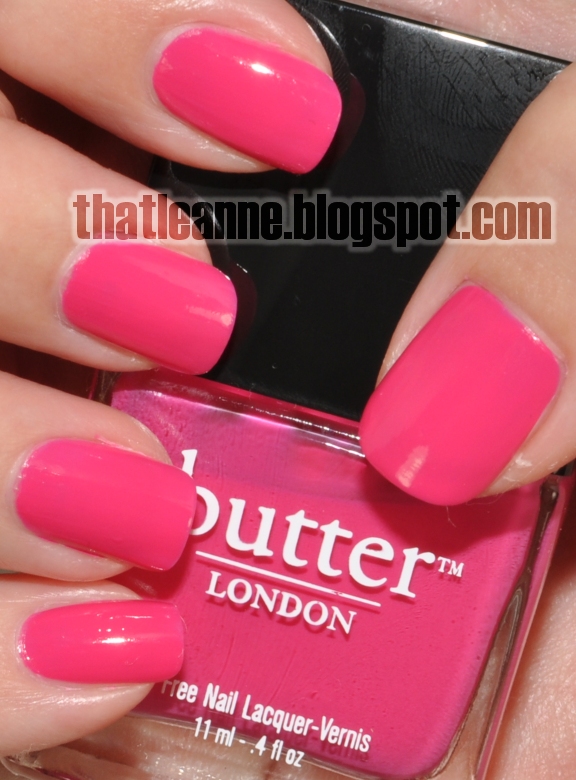
Now of course if you have seen butter London Primrose Hill Picnic, you'll know it's very much pink and not red, I just took that picture using Hipstamatic on my iPhone. The actual colour is more like this:


And it's beautiful! I love it. Unfortunately when I ordered this polish online (with two other lovelies from the new collection) I was actually sent Queen Vic instead. Yuck! Well, it's not yuck, it's just not my colour, I had my heart set on this colour so I quickly returned it and got the correct one sent. Whew!

So if you are interested in doing this popular look, I did a quick how to:


Firstly I came to the quick realisation that I didn't have a nice light green to use for the inner part of the watermelon so I went with pink :-D Well I could have used the same one from my last watermelon nail art post but I wanted a nice light colour. I ended up using Pink Friday from the Nicki Minaj collection. Secondly I did another shorter tip with Essie Pretty Edgy. Thirdly I used another polish from the Nicki Minaj collection for the watermelon skin detail - Did It On 'Em. I originally chose another colour but it didn't contrast well with the Essie colour and you can probably see if you look closely. Lastly, I used a black polish to draw little seeds on the nails.


And that is it! I realised after I did the thumb nail that the other nail tips needed to be more rounded. Otherwise a pretty simple look to recreate! I wish I had asked the nice girl at Lush what colours she used.

Anyway I hope you enjoyed the post and are having an awesome long weekend if you're lucky enough to be having one :-D I think Canberra and Vic have holidays tomorrow. I'm off to have dinner and play some online games. See you next time!

Sunday, December 4, 2011

Holiday nail art: Stockings!

Today I have a very pretty polish to show you - butter London Henley Regatta! I picked this up in Nordstrom (whilst on holidays earlier this year) but hadn't gotten around to wearing it until this week. I layered it over Illamasqua Viridian and drew some stockings to get into the Christmas spirit:


Henley Regatta is a glitter polish with a clear base but it's oh so pretty:


I only needed one coat to get this effect:


Viridian is gorgeous on its own but combined with this polish, it's downright gorgeous!


So as usual I started with the thumb nail and I wasn't really sure where I was going but I decided to draw my name on the stocking :-) I was slightly inspired by the coke name thing:


So to start, I outlined the stockings with a small nail art brush and OPI Alpine Snow:


Next I filled the tops of the stockings:


Then with Illamasqua Throb filled the rest of the stockings:


Then I wrote names for the rest of the stockings and all done!


And while I was in the festive spirit, I decided to dress up the dining table a little since we aren't having a Christmas tree this year (we're spending Christmas with the in-laws). I started with things I had lying around the house then I wanted to get some plates and cups so I went shopping. And Target was having a sale so I ended up redoing it like this:


I wanted to get a few more things but I am poor this Christmas haha. Anyway, I hope you enjoyed the post and the stockings! I'm growing a nice collection of butter London polishes and no doubt I will expand the collection! Hope you all had a fantastic weekend and I'll see you next time!