Hi everyone, Meghan here! When it comes to blogging about nail polish and nail art, taking good photographs seems to be a concern for most people.

I wish I could give you some clear rules and guidelines, but I know from experience that the one thing you can do to improve your nail photographs is to take lots of pictures. My first photos were nothing to write home about. Over time, I made a number of adjustments - like buying a new camera, using a light box, and getting an editing program to adjust the contrast and levels. Now, after 1-½ years of taking photos of my nails I can see the difference, but from day-to-day, not so much.
If you want to take better pictures, my advice for you is to pick one thing to improve - for example, lighting, hand poses, or editing. Once you feel you’ve improved in that one area, move on to something else. Gradually you will start to see overall improvement. You can and you will have photographs that you’re very proud of!
This post is meant more as an overview of the basics of taking better nail photos. I feel like I can write several posts on the topic! But here’s what you need to get started.
Before the Photo: Hand and Nail Care
Nothing beats regular nail care. Luckily we have a post on that, from the expert Bee Polished.
Let’s say you’ve just done an amazing mani, and you want to capture it right away. A few simple things will make your hands look photo ready.
 |
| My nail care tools when taking photographs: cuticle oil, cuticle stick (for cleaning cuticles, pushing in edges of glitter, etc.), cleanup brush, lotion |
-Clean up any nail polish around the cuticles and on your fingers. I use an angled eyeliner brush dipped in acetone. If you don’t own any acetone, buy it for this purpose, believe me, it makes a difference.
-Make sure that your hands are moisturized. Take a minute to put on some lotion, but wipe off the excess so your hands don’t look greasy.
-Use a dab of cuticle oil if you have dry cuticles. Again, you don’t want too much, make sure to rub it in and wipe away any excess.
I’ve found the camera picks up all your imperfections and magnifies them. That’s why it’s good to take a few minutes to do proper cleanup and to make sure your hands and cuticles are moisturized (without looking too greasy).
Lighting
After hand and nail care, lighting is really essential for good photos. Lighting can make or break a photo, it can also create a certain mood, and it can have a big impact on the look and colour of your polish.
If you are doing swatches, balanced lighting with no shadows is important so that people can see the colour and finish of the polish without distraction. Balanced lighting is also important for nail art, but there’s also some leeway to play with lighting to create a mood.
There are three major kinds of lighting setups, each with its advantages and disadvantages.
Natural Light: This is the easiest setup of them all - there is no set up! Natural light can be excellent for recording accurate colours, and direct sunlight is the best for capturing the rainbow effect of holographic polishes. But it can also be a temperamental setup. I find natural light tends to work more for people who live in warmer climates with frequent nice weather. Up here in Canada it might work in the summertime, but come winter, the sun is not too dependable.
 |
| Daylight photo courtesy of Peace, Love and Polish |
Heather of Peace, Love and Polish gives some advice on taking photos in the sun:
Look for a place with indirect sunlight so it's bright, but doesn't create a shadow. I usually do mine in a certain place behind my back porch. I do take photos on cloudy days - as I've not noticed a difference but really cloudy days tend to not work for me.
The Light Box: If you can only take your photos at night, or you don’t like the inconsistencies of natural light, then some sort of artificial source is your option. A light box is basically a box with sides that are sheer enough to let light through, but still diffuse it. You shine one or more lights through the sides, and anything in the box will have balanced, diffused lighting. Light boxes are great because you don’t end up with the harsh shadows you may have with direct light setups or sunlight. The disadvantage is that holographic polishes don’t photograph as well in a light box.
 |
| Gnarly Gnails Photo Setup With Light Box |
Gnarly Gnails description of her light set up:
The lightbox I use is a square 16" light tent. It's made of white nylon and folds down into a flat carrying "briefcase" style. I got mine for about $25 through this shop on eBay. My lighting is set up with one lamp on each side of the box. The lamps were some super cheap desk lamps with flexible necks I got for about $5 each at WalMart - and the bulbs are 14 watt Daylight bulbs. I use a black velvet sweep that came with my lightbox, but it also comes with white, red and blue. All in all this setup cost me about $40 and has really stepped up my photo game.
Direct Light: This method involves placing your hand in front of, or above, some backdrop (usually a piece of paper), and shining a light onto your nails. You can also use two lamps to eliminate shadows, and balance out the lighting. Direct light setups are good because they let you photograph holos and shimmers indoors. Depending on the setup you can also create photos that have dramatic contrast.
 |
| Lindsey's Lighting Setup for Wondrously Polished |
Lindsey at Wondrously Polished describes her lighting setup:
My photo setup up is pretty simple and sits on my desk. I use two desk lamps that I purchased from Target for around $15/each and have a 5500K OttLamp bulb in each of them to simulate daylight (important since I almost always do my nail art at night). I use a tripod with my camera so that my photos are as clear as possible with minimal blur from camera motion and I rest my arm/wrist on the white box sitting between the lamps. The black backdrop is just thumbtacked to the wall and provides a clean backdrop for my photos. And that's it! I have adjusted my white balance to be custom to my setup, and I tilt my hand as needed to help avoid glare from direct light on my nails. I also have two floor lamps that provide some additional lighting around my setup which is helpful for even lighting.
If natural light doesn’t work for you, you can create a good lighting setup with minimal cost. I think the two setups by Lindsey at Wondrously Polished and Missy at Gnarly Gnails, are good examples of how affordable a home setup can be!
Camera Tips
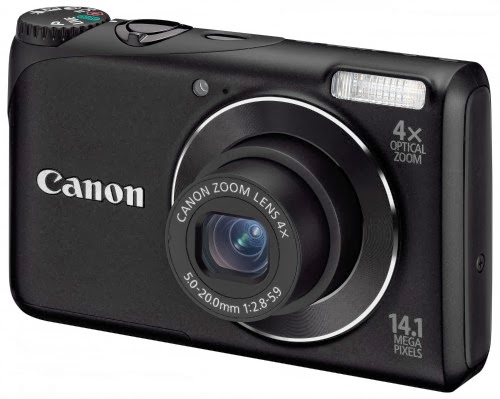
You don’t need a fancy camera to take photographs of your nails. In fact, you can see from our post on cameras that many Easy-Nail Art ladies use regular point-and-shoot cameras. If you’re shopping for a camera you want to make sure that the camera has manual settings that you can adjust and a good macro zoom.
 |
| My two cameras: Left, my current camera. Right, my camera used for my first few months of blogging. |
I won’t go into detail about camera setting but here’s the two main ones you’ll need to adjust for taking nail pictures:
Macro: Hopefully your camera has a “macro” or “macro zoom” function. Usually it looks like a little flower. This is what you need in order to get up close to your nails. In order to get true macro shots you need a DSLR with a macro lens, but this will let you get close to your nails without the photo becoming blurry.
 |
| Setting the macro feature |
Tip: When using the macro setting, you want to steady your hands as much as possible. Use a small tripod, or make sure your hand or elbow is rested on something to keep it from shaking.
White Balance: The white balance lets you adjust for different lighting setups - daylight, fluorescent, etc. - it’s what you use to get rid of any weird colour casts. The best thing to do is adjust the white balance manually. To do that, go to the white balance feature in your camera, select “set white balance,” and point your camera at something white (piece of paper, card, etc.) and click. If you can’t adjust the white balance manually, I’ll show you how to adjust it in the editing process.
 |
| Setting the White Balance |
Tip: Before you finish taking photos, take a good look at the photos on your camera. Zoom in to make sure that you got good focus and there's no stray pieces of fuzz or cat hair. I can't tell you how many times I've thought my photos were good, only to look at them on my camera and notice a piece of cotton lint hanging off one of my fingers!
After the Photo: Editing Your Pictures
So you’ve taken your pictures and you’re ready to post them on your blog - but wait! You still have one more step. Editing, like lighting, can make or break a picture; it’s what gives your photos a finished look. Editing nail pictures is another huge topic, and includes both beginner and advanced techniques, so I’ll just go over the basic things you should do to get your pictures ready to put on your blog.
Cropping: Whether you do basic editing or more advanced stuff, cropping is one thing everyone will do. You can do a close crop where you eliminate everything except your nails and part of your hand, or you can crop the photo so that you have some extra space around your hand. Each one gives the photograph a different feel. If you take your photos outdoors and have other things in the background, it’s good to crop them out so that they don’t distract the viewer.
 |
| Sassy Shelly crops her photos so that you can see the polishes and stamping plate she used for this design |
 |
| Bee Polished does a close crop so that there's more focus on the nail art |
Adjusting White Balance: If you couldn’t, or forgot, to change the white balance settings on your camera, or if your camera didn’t do the best job adjusting the white balance, you can adjust it during the photo editing process. In Adobe Photoshop Elements (which I use), it’s a feature called “Remove Color Cast”. If you click on an area that is supposed to be white, grey or black, it will adjust the white balance very easily. Check your photo-editing program to see if it has a similar feature.
 |
| Adjusting white balance in Photoshop Elements |
Adjusting Values: Even with two lights, my photographs still come out a bit dark. So I often use the “Brightness/Contrast” feature to lighten the picture while still maintaining a good contrast and range of values. Other photo editing programs might refer to it as adjusting the exposure.
 |
| Adjusting brightness and contrast in Photoshop Elements |
Adding a Watermark: We have an entire post planned on doing watermarks, so I won’t go into detail here. But if you’ve spent the time taking a good picture, and editing it just right, you should definitely put your name on it. Even if it’s something in the corner with your blog name or logo.
Conclusion
So there you have it! This is just meant to be a basic overview of how to take better nail pictures. Are there any specific topics you’d like to see covered in an advanced post? What are your best tips or tricks for taking better photos?

Dj Donk
How To,
Photography




.jpg)


